
I feel like it's been 5 years since I've written an entry! Truth is, I have been blessed with a small bit of success selling my handmade rustic wood signs! (If you want to check out my recent signs go to my Facebook page www.facebook.com/DIYife and click on my "sign gallery" album). Even though I have been so consumed with the "business" side of DIYife I wanted to be sure I was still trying to throw in some fun projects I've been working on too!
I went to Hobby Lobby for glue this morning and stumbled upon this GORGEOUS fall wreath

I really, REALLY tried to justify the price tag...like "my kid was screaming in the shopping cart for 20 minutes" tried to justify the price tag but I just couldn't do it. I mean I even grabbed it, threw it in the cart and pushed through those thoughts until I reached the checkout lane and came to my senses. Mr. (and my cheap buyers remorse self) would have FLIPPED if I purchased a $229 wreath even IF I could try to finagle my way through the argument by saying it was on sale for $140. Worth every penny... this puppy was HUGE but in the end I decided making my own was the better choice.
I took a deep breath and went to the fall decor aisle and what do you know? It was like the Heaven's opened up...ALL the supplies to make my own wreath were 40% off!! HALLELUJAH. I still had the "end all be all" of wreaths in my cart so it was easy to kind of copy the elements. A grapevine wreath, a few pumpkins, burlap flowers, pine cones, gourds and some hay looking things later and I was out of there all for about $45 bucks. (I couldn't find the artichoke picks anywhere and for some reason I'm really drawn to those LOL. I will continue looking for those at a later date)
Back at home I unloaded my bags and was ready to go!

I started with the pumpkins (largest first).
 |
| sorry for the blurry picture! |
I then bent the hay into arches and stuck them around the wreath, so they were evenly spaced, and added the remaining gourd and white pumpkin picks to the empty spaces.
 |
| sorry for the blurry picture! (groundhog day anyone?) |
I wanted to be sure I was getting everything evenly spaced so I hung the wreath with twine on my door to the garage to finish adding the final pieces. At this point I had added additional white sunflowers and a few quail feathers I had picked up. It was getting there!

I had purchased a few pine cones to stick in there as well but had to come up with a way to attach them. I wanted to avoid a hot glue mess so I came up with this idea:
First I cut a piece of burlap ribbon into a small square:

Then I hot glued that piece onto my pine cone sort of in the middle...

I then took some twine I had laying around and put it through the holes of the burlap trying to get it more in the center holes than the outside ones in case it started to unravel a bit.

Lastly I just tied those onto my grapevine wreath! (I'm pretty proud of myself for thinking up this one...it was simple and clean and most importantly, IT WORKED!)
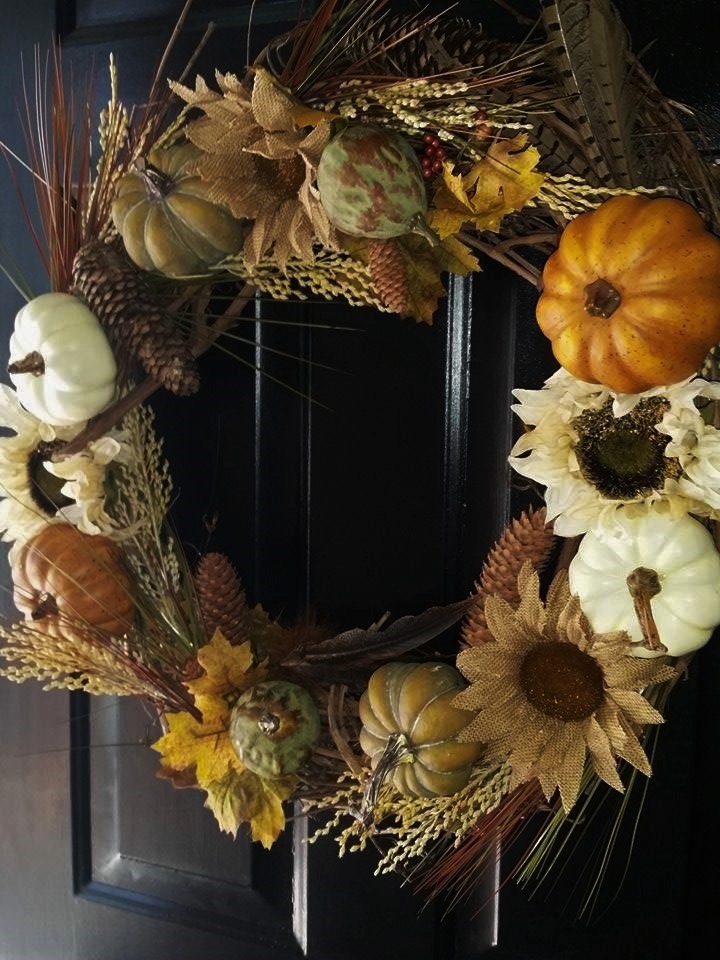
It could still use some of those darn artichokes and maybe some of that flocked vine but I think it came out pretty good. Especially for 1/3 of the cost! What do you think?


